 If you're considering a home renovation or just looking to add some warmth and comfort to your living space, then hardwood flooring may be just what you need. Not only does hardwood flooring have an attractive appearance, but it also combines durability and wear resistance that can last a lifetime. In this blog post, we'll explore the most popular types of wood used for flooring, how the sawing process affects its appearance and wear resistance, and the benefits of adding hardwood flooring to your home. When it comes to choosing the right type of hardwood flooring for your home, oak, maple, birch, and cherry are among the most popular species. Oak is the most preferred due to its durability and attractive grain patterns, and maple is best for its hardness and pale coloring. Birch and cherry are also popular, but they can be a bit softer than oak and maple, which may make them more susceptible to scratches and wear over time. How the wood is sawn also affects both its appearance and wear resistance. Plain-sawn flooring, or rift flooring, has noticeable grain patterns and can wear unevenly over time. On the other hand, quarter-sawn flooring, or edge grain, has a more even grain pattern that is preferred for better wearing qualities. When it comes to sawing, it's important to choose the right cut for your needs and preferences. Another benefit of choosing hardwood flooring is that it can be sanded up to six times in its lifetime, which helps prolong its life and maintain its beauty. This means that even if your floors begin to show signs of wear and tear, you can easily restore them to their former glory by sanding and refinishing them. Additionally, hardwood flooring is easy to maintain and clean, making it an excellent choice for homeowners who want a low maintenance flooring option. One of the most appealing aspects of hardwood flooring is its warmth and comfort, which can make your home feel cozy and inviting. Unlike other types of flooring, wood also has natural insulating properties, which can help regulate the temperature of your home and save on energy costs. Additionally, the color, grain, and pattern of the wood can add character and style to your home, making it a timeless and classic flooring choice. In conclusion, hardwood flooring is an excellent choice for homeowners, building contractors, and interior designers who want to add warmth, comfort, and durability to their living space. Oak, maple, birch, and cherry are popular species, and the sawing process affects both its appearance and wear resistance. Additionally, its natural insulating properties, low maintenance, and ability to be sanded and refinished up to six times make it a smart investment that can last a lifetime. If you're considering a home renovation, consider adding the beauty and elegance of hardwood flooring to your home. For all issues related to the selection, installation and refinishing of hardwood flooring, when in doubt you’d better aks trusted experts: https://robarflooring.ca/installation/ https://robarflooring.ca/refinishing/ https://robarflooring.ca/services/ https://robarflooring.ca/hardwood-flooring-in-toronto/ https://robarflooring.ca/hardwood-flooring-in-mississauga/ https://robarflooring.ca/hardwood-floor-sanding-and-recoating/ https://robarflooring.ca/professional-hardwood-floor-repair/ https://robarflooring.ca/hardwood-stairs-installation/ Photo by Michael McAuliffe on Unsplash
0 Comments
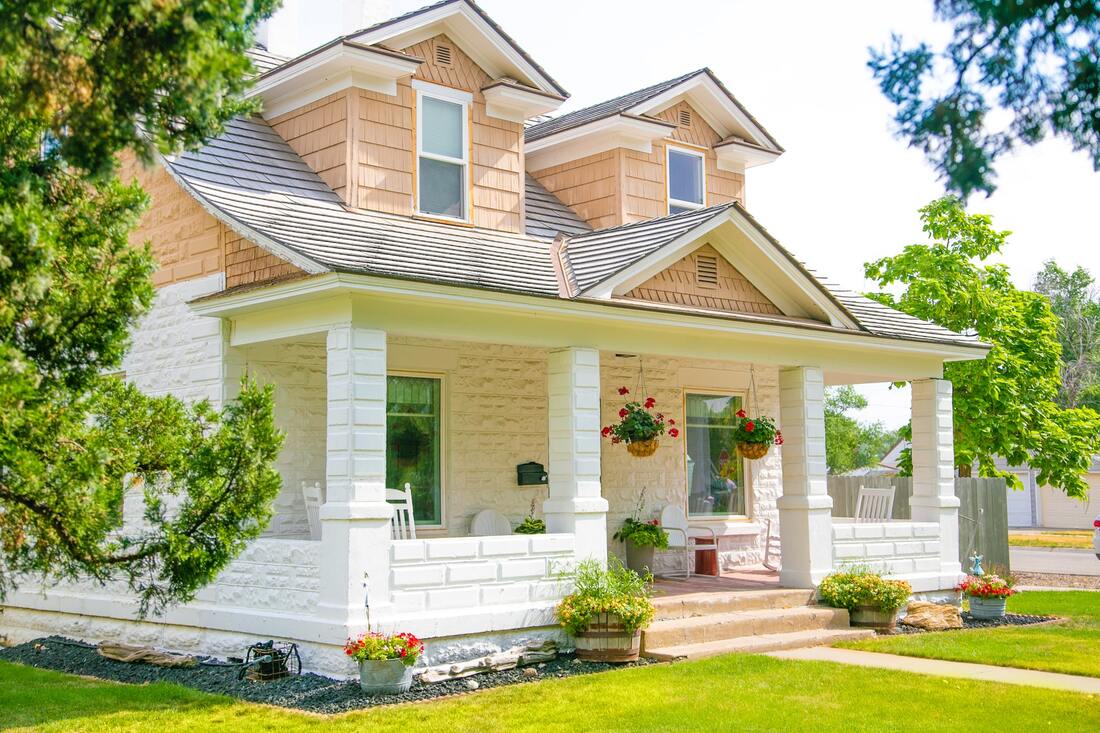 Are you interested in sprucing up the exterior of your home? Are you looking for a cost-effective, stylish option to add flair to your property? Have you ever heard of faux stone veneer or polymer stone siding? These two materials are becoming increasingly popular among homeowners and DIY enthusiasts alike. Let’s take a look at why they are gaining traction and how they can be used in home improvement projects. Faux Stone Veneer Faux stone veneer is an artificial material that looks like natural stone, typically in limestone, ledgestone, or fieldstone versions. As such, it offers a lighter weight alternative to real stone and is generally more affordable or budget friendly. One of the biggest benefits of installing faux stone veneer is the ability to choose a specific colour blend and have that colour remain consistent throughout the project. It makes installation much easier since each piece fits with other pieces without having to worry about matching shades or tones. Polymer Stone Siding Polymer stone siding is another popular choice for exterior home renovations. Unlike faux stone veneer, this material does not resemble any type of natural stone but instead provides a unique appearance that stands out among traditional siding options. Made from quality polypropylene, it can withstand extreme temperatures and requires no maintenance whatsoever. Polymer siding has become so popular due to its durability and versatility; it can be used on residential or commercial projects of any size! Plus, there are many different colours available if you want something other than the classic white siding look. Whether you’re looking for a natural stone look with faux stone veneer or something more modern with polymer siding, these materials offer great design alternatives for any kind of home improvement project. They are both lightweight, easy to install, budget-friendly options that give your property an upgrade without breaking the bank. And best of all–they both require virtually no maintenance once installed! So if you’re looking for an exterior upgrade without too much hassle or cost, consider faux stone veneer or polymer stone siding as viable options for your next project! Find some inspiration and some top notch products here: https://canyonstonecanada.com/rockstone/rockwalls/Rocky-Ledge https://canyonstonecanada.com/wallpanels/wallpanel/QuickFit-Ledge-Stone https://canyonstonecanada.com/stackedstone/stackedstones/Faux-Stacked-Stone https://canyonstonecanada.com/limestones/limestone/Lime-Stone https://canyonstonecanada.com/fieldstones/fieldstone/Field-Stone https://stoneselex.com/Faux-Stone-Siding/Exterior-Stone-Siding https://stoneselex.com/Versetta-Stone-Siding https://stoneselex.com/Faux-Stone-Siding/Stacked-Stone https://stoneselex.com/brick-and-stone/Dry-Stack-Stone-0615 https://stoneselex.com/brick-and-stone/Timber-Ledgestone-0813 Photo by Ian Macdonald on Unsplash
 When you think of Finnish design, what comes to mind? If you’re picturing sleek lines, simple shapes, and a focus on functionality, then you’re on the right track. Finnish style is all about keeping things clean and uncluttered — which can be a refreshing change of pace in today’s fast-paced, constantly-connected world. If you’re looking to add a touch of Finnish flair to your home, here are a few tips to get you started.
Finnish Style in the Interior of the House Incorporating Finnish style into your home starts with decluttering and simplifying your space. Take a good look around your rooms and get rid of anything that doesn’t serve a purpose or that you don’t absolutely love. Once you’ve edited down your belongings, it’s time to start thinking about furniture. Choose pieces that are functional and stylish, but that also have clean lines and simple forms. In terms of color, white is always a safe bet in Finnish design — but black, gray, and natural woods are also popular choices. And don’t forget about texture! Incorporating different textures into your space will add visual interest and depth. Finnish Style in the Exterior of the House The exterior of a Finnish-style home is often just as important as the interior. After all, why not take advantage of Finland’s stunning natural scenery? If you have a yard or garden, keep things simple by planting native grasses and wildflowers. And if you have a patio or deck, make sure it’s furnished with comfortable outdoor furniture that can be enjoyed year-round. No matter what type of outdoor space you have, stringing up some fairy lights is always a good idea — they’ll add a touch of magic to any outdoor gathering. Whether you want to makeover your entire home or just add a few finishing touches, incorporating Finnish style into your décor is a great way to create a calm and relaxing space. Keep things simple and uncluttered, focus on functionality, and take advantage of Finland’s natural beauty — and soon you’ll have the perfect haven to escape the hustle and bustle of everyday life. Photo by Lassi on Unsplash 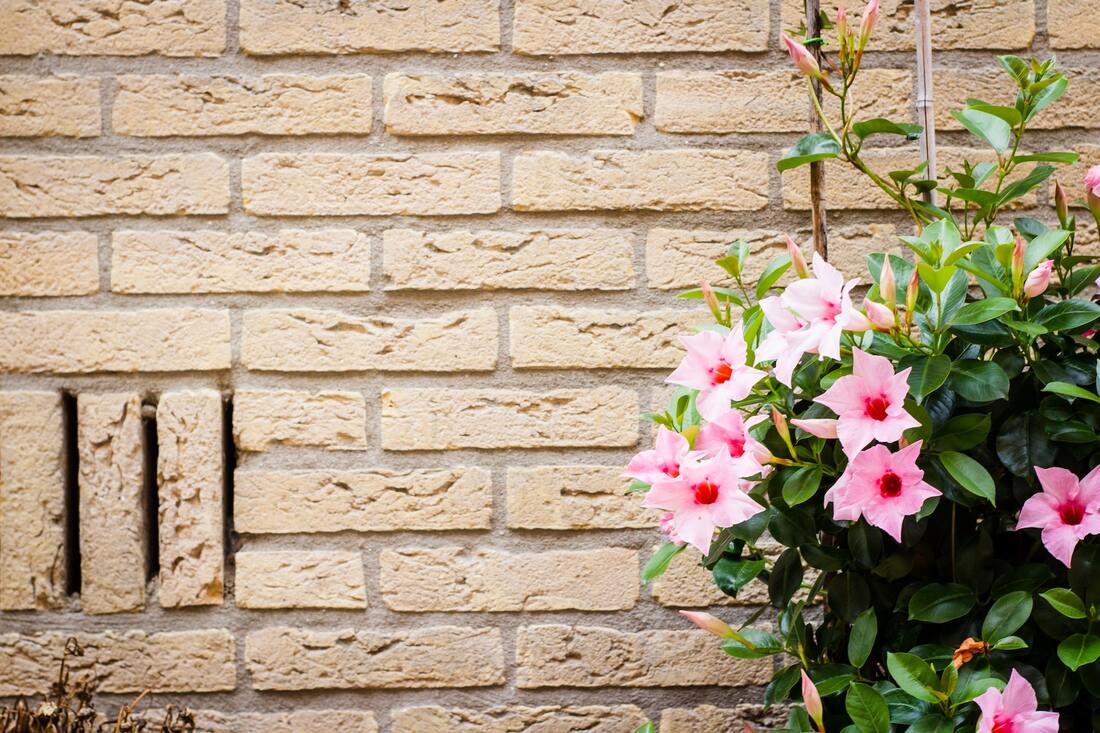 Are you thinking about adding a new look to your home or office? You may have considered thin brick veneer, natural stone veneer, or an accent wall. Each of these options has its own unique benefits and drawbacks. In this blog post, we will compare the three so you can make an informed decision when selecting the right option for your project.
Thin Brick Veneer Thin brick veneer is a popular choice for those looking to create a classic look with modern convenience. It is made from real clay bricks that are cut into thin slices and mounted onto walls with mortar or adhesive. Thin brick veneer typically costs less than natural stone veneers. However, it also requires more labor-intensive installation due to the use of mortar and adhesive. Additionally, it may need more maintenance over time since it is susceptible to water damage and cracking. Natural Stone Veneer Natural stone veneers are becoming increasingly popular due to their ability to add beauty and sophistication to any space. Natural stone veneers are made from real stones cut into thin slices and mounted onto walls with mortar or adhesive. The cost of natural stone veneers is usually higher than that of thin brick veneers because they require more labor intensive installation. Natural stone veneers are also generally more durable than thin brick veneers as they are not susceptible to water damage or cracking but will still require some maintenance over time such as sealing the stones against moisture penetration every few years. Accent Wall An accent wall is a great way to add texture and depth without having to commit to covering an entire wall in either thin brick or natural stone veneer. An accent wall can be created using any combination of materials such as paint, tile, wallpaper, wood paneling, etc., depending on the desired effect you want to achieve in your space. An accent wall may be cheaper than both thin brick and natural stone because it requires less material and labor-intensive installation compared to the other two options; however, it may not last as long due the use of materials that may be damaged over time by exposure to elements such as humidity or sunlight. Additionally, an accent wall may require more frequent painting depending on what type of paint was used in order for it to remain looking its best for years to come. Check out some nice natural stone veneer and thin brick veneer options for accent walls: https://canyonstonecanada.com/Thin-Brick-Veneer https://canyonstonecanada.com/wallbricks/wallbrick/Antique-Brick-Veneer https://stoneselex.com/Thin-Brick-Veneer https://stoneselex.com/brick-and-stone/faux-stone-panels-Toronto-0819 https://stoneselex.com/brick-and-stone/stone-accent-wall-GTA-0120 https://canyonstonecanada.com/naturalstones/naturalstone/Natural-Stone-Veneer https://stoneselex.com/Natural-Stone-Veneer Photo by Louis Hansel on Unsplash 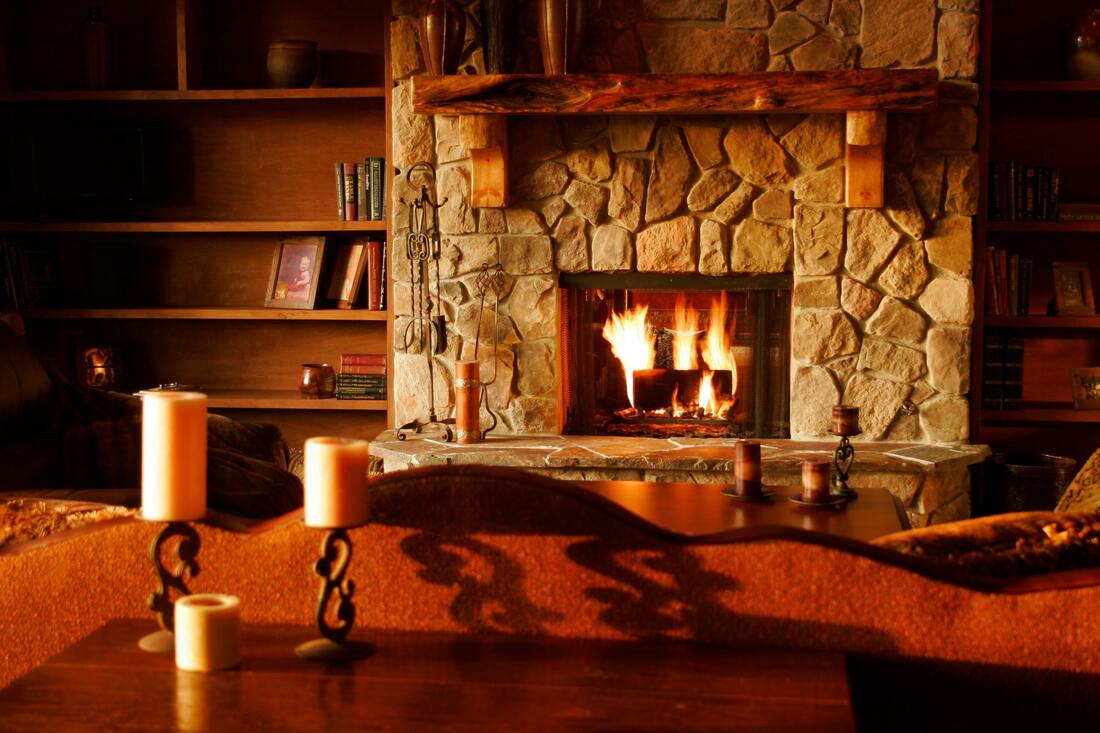 Your brick fireplace is the centerpiece of your living room, so it should look its best. If you’re looking to add an elegant touch to your space and give your fireplace an upgrade, brick fireplace refacing with stacked stone is the perfect solution. From white stone to ledgestone and everything in between, there are plenty of options when it comes to fireplace stone facing. Read on for a step-by-step guide on how to reface your brick fireplace with stacked stone. Step 1: Preparing for Brick Fireplace Refacing Before you start the process of refacing your brick fireplace, make sure that it is clean and free from dirt or debris. You will also want to check the integrity of the mortar joints between each brick. If necessary, use a hammer and chisel to remove any loose mortar before you begin. Step 2: Installing Lath Next, you will need to install lath on top of the existing brick surface that you plan on covering with stacked stone. This will help create a solid base for the stones and ensure that they are securely attached. Start at one end of the wall and work your way up, using screws every few inches along each row of lath strips. Once this is done, cover the entire wall with stucco mesh so that it’s ready for application once you’re done laying down all of your stones. Step 3: Adhering Stones Now it’s time for the fun part—laying down all of those beautiful stones! Begin at one end of the wall and work your way up, making sure that each stone is securely adhered by pressing firmly against each piece as you go along. It’s important to note that some stones require special adhesives or grouts in order for them to stay secure over time—make sure you read all instructions carefully before applying anything! Step 4: Finishing Touches Now that all of your stones are laid out, it’s time for some finishing touches! If desired, place a reclaimed wood mantel above the top row of stones or use adhesive accents like glass tiles or metal strips in between stones for added visual appeal. Then stand back and admire your handy work! A brick fireplace refacing with stacked stone can seem like an intimidating task but don't worry — it's actually quite straightforward if you follow these steps! Every home has its own unique design elements so take some time to explore different options until you find something that fits perfectly into yours! With just a few simple steps, you can transform an outdated brick fireplace into something truly special! Take a closer look at some specialized products for brick fireplace refacing here: https://stoneselex.com/brick-and-stone/Fireplace-Stone-Refacing-1015 https://stoneselex.com/brick-and-stone/stacked-stone-fireplace-GTA-1219 https://stoneselex.com/Stone-Veneer-Fireplace/Fireplace-Stone-Facing https://stoneselex.com/brick-and-stone/White-Interior-Design-0216 https://stoneselex.com/Decorative-Accessories/Reclaimed-Wood-Mantel https://canyonstonecanada.com/stonetiles/stonetile/Quartzite-Ledge-Stone https://stoneselex.com/brick-and-stone/Timber-Ledgestone-0813 Photo by Timothy Eberly on Unsplash |
 RSS Feed
